This article is expanded from one that appeared earlier
in the year as part of a series of articles on tents and backpacking I wrote
for The Great Outdoors in conjunction with Hilleberg. I posted the first
article on choosing a tent last month.
Shelters, whether tents or tarps, really come into their own
when the weather turns stormy.
The way you pitch a shelter is often key to how secure it will
feel. It can be immensely comforting to be warm and dry in the wilds inside a
shelter you know is sturdy and well-pitched while rain, wind or snow whirl
outside. Conversely, being inside a poorly pitched shelter which seems at risk
of collapsing can be a very unnerving experience and guarantees a poor night’s
sleep.
To maximise storm-worthiness there are a number of things
you can do. The first is to ensure you are familiar and well-practiced at
pitching your shelter so you do it quickly and efficiently in poor conditions –
a howling storm is not the best time to be fumbling with a confusing mass of
flapping nylon. Knowing the capabilities of your shelter is important too.
 |
On a showery very windy day I found a sheltered site by dropping down into the top of a forest in the lee of the wind
|
1.
Pitch selection
In very windy weather, a sheltered site is
well worth taking the time to find, though sometimes an exposed pitch may be the
only option there is. Often, though, there are options; even a gentle bank or a
pile of rocks can help cut the wind. Passing by that lovely hillside pitch and
continuing downhill to a less windy spot is a good idea. In heavy rain, be wary
of damp hollows though; these could fill with water. In woods, look up. Camping
under a dead branch is a bad idea.
 |
On a day of heavy rain and strong winds I descended into a glen to find a sheltered spot and then spent some time finding a slightly raised spot in case the river rose.
|
2. Pitching
To stop your tent blowing away,
peg down one end securely before inserting any poles or laying the tent out. In
really strong winds you can put your pack on the tent while you do this or even
lie on it. Then peg down the other end before inserting the poles (you may then
have to unpeg each corner in turn to get the poles in).
Tunnel tents should be pitched
with the rear into the wind for best stability. With other designs the door
should be away from the wind if there’s only one.
3. Pegs and guylines
Pegs should go in at about a 45-degree
angle (leaning away from the tent) right up to their heads. Carry a selection
of different pegs for different ground conditions – thin ones for stony and
hard ground, wide ones for soft ground – so you can do this. In hard ground
pegs can be pushed in with your feet or hammered in with a small rock. Don’t
hit them too hard, even the toughest pegs can bend or break (a good reason for
carrying a few spares).
If pegs really won’t go fully into the
ground, pegging loops and guylines should be looped round the peg at ground
level – higher up and they could lever the peg out. All guylines should be
pegged out and tightened. I do this even if it’s calm – the wind may pick up
during the night.

Pitching in snow
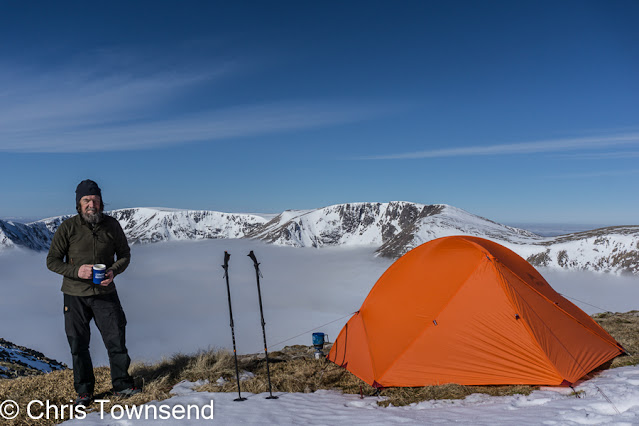
It’s always preferable to pitch on dry
ground rather than snow – it’s easier to do and the tent will be warmer,
especially under you. When snow cover is extensive camping on it may be the
only option. When this is the case a
snow shovel is very useful for preparing the site (and transporting snow for
melting for water). I always carry one.
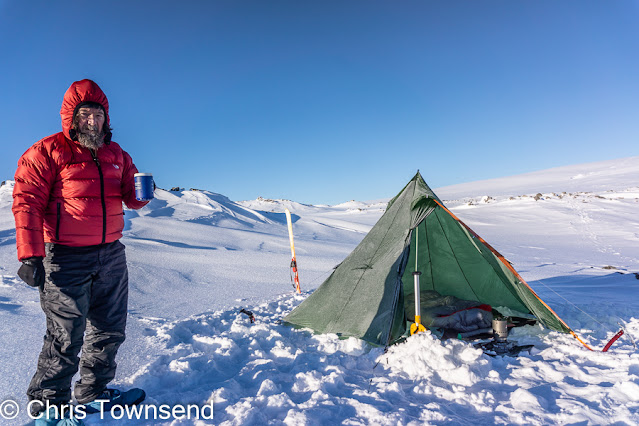
In soft snow, a platform should be stamped
out then levelled for the tent. The platform should be as flat as possible –
any lumps will harden under you. Leading the platform to firm up is the best way
to avoid this but in a storm you’ll want to get under cover as soon as
possible.
Special extra wide and long pegs are useful
for snow. In soft snow these should be buried horizontally with guylines looped
round them. Extra cord may be needed for pegging points round the edge of the
flysheet for this. Ordinary pegs can be buried like this too. Stamp down on the
snow above the peg to harden it – they’ll freeze in place and you may need an
ice axe to dig them out the next day. Ice axes, trekking poles, and skis can be
used as pegs in snow too.
5. Securing gear

Before pitching the tent, ensure all other
gear is in your pack and the lid is shut so it stays dry and doesn’t blow away.
Tent stuffsacks should be pushed into garment or pack pockets to stop them being
lost to the wind.
Final checks
Before getting inside the tent
check all pegging points are secure and tighten the guylines. In rain it’s
worth getting out last thing before sleep to tighten everything again – some
tent fabrics stretch when wet. If it’s snowy, knock any snow off the tent. In
very heavy snow you may need to do this during the night too.
7. Keeping the inner dry
Fill up water containers and do
any other outside chores before entering the tent. If your outer clothing is
wet, strip this off in the porch. A small sitmat is useful for kneeling on to
do this. The idea is to keep any damp gear out of the inner tent so it stays as
dry as possible.


