Tuesday 30 May 2023

Carn Mor The Hard Way: A Walk In Knoydart part one

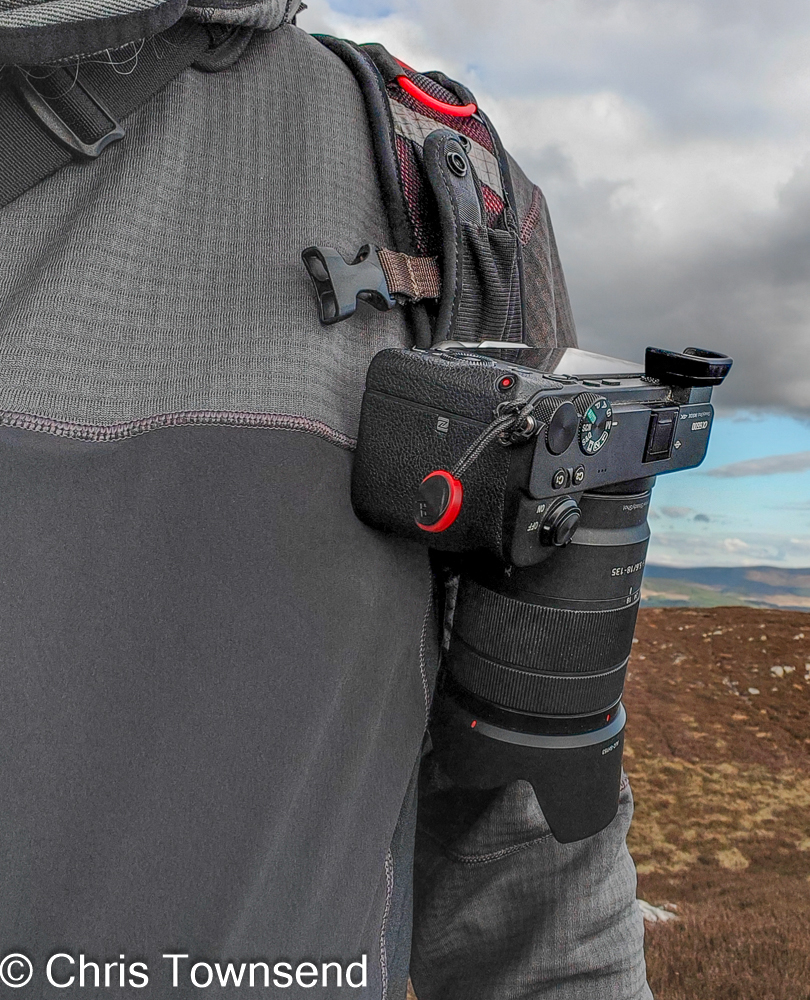
Loch Morar from the ascent to Meall nan Each

Rain and wind spattering and blowing against the tent woke me several times. It was the first night of a two-week trip in the wild of Knoydart in the Western Highlands, a place noted more for wet weather than sunshine, and also for the ruggedness of the terrain, hence being known as The Rough Bounds.

First camp: Glen Pean

For the first five days I was with Tony Hobbs, on his first visit to the area, and his dog Lassie. We’d met in the afternoon at the end of the long rollercoaster road stretching from the Great Glen to the head of Loch Arkaig and walked for few hours along Glen Pean before camping beside the river. My plan was to walk through Glen Pean and descend Gleann an Obain Bhig then return to Loch Arkaig over 829-metre Carn Mor. Four days for this I thought, leaving a day for an ascent of 718-metre An Stac with light packs.

In the rain in Glen Pean

By the end of the second day I’d realised we didn’t really have a spare day for An Stac and that idea was abandoned. The walk through Glen Pean, mostly in wind and rain, had proved quite arduous. 
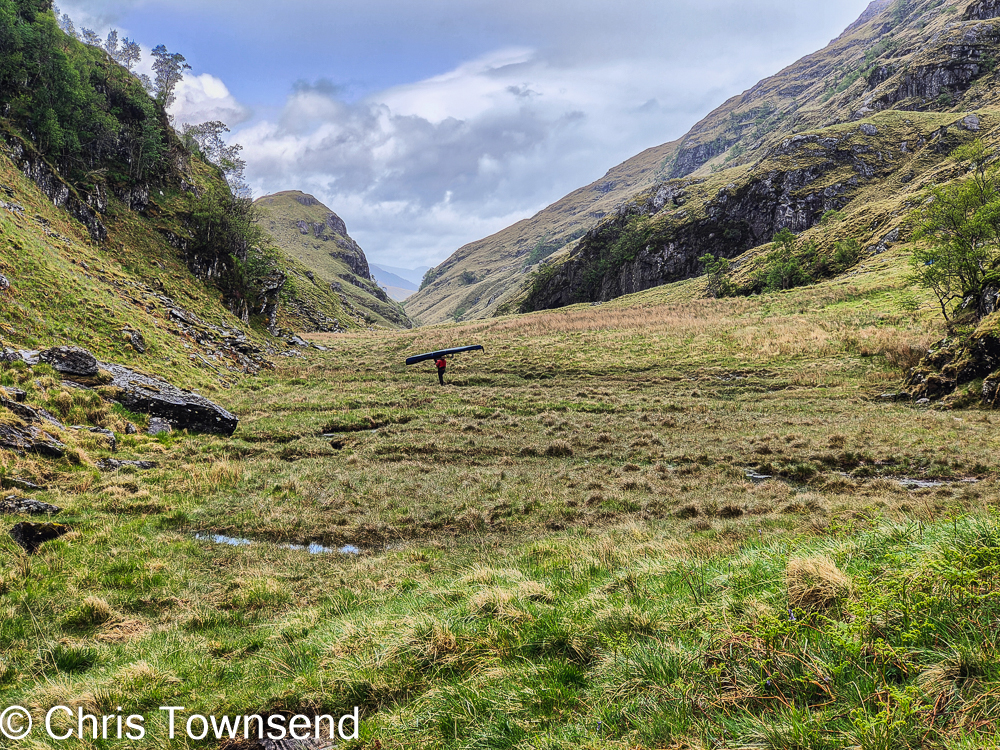
Kayak Man

This is a wonderfully wild and dramatic glen but not that easy to traverse, though much easier for us than the man we met with a kayak on his head. He was portaging the kayak and a massive amount of gear from Loch Morar to Loch Arkaig and this was his fourth trip through the massive rockfall at the head of Glen Pean. We’d already passed two big bags of gear plus a trolley and a paddle and wondered about them. I reckoned they must belong to a group, though the paddle was puzzling. I hadn’t thought it would be just one person lugging all this stuff and a kayak through the mountains.

Tony finding a way through the rocks

At least he wouldn’t have to lug everything up and down the narrow path that crosses steep slopes high above the crags that fall into little Lochan Leum an t-Saigairt, which we’d just done when we met him. There the kayak would be useful. Getting it through the rocks where Glen Pean narrows at its head must have been extremely difficult though. This tremendous place is a glorious confusion of massive boulders and crags and green with trees and moss, a tiny sliver of temperate rainforest.  We found an intricate way through this tangle of vegetation and rock amazed that anyone could manage to transport a kayak here.

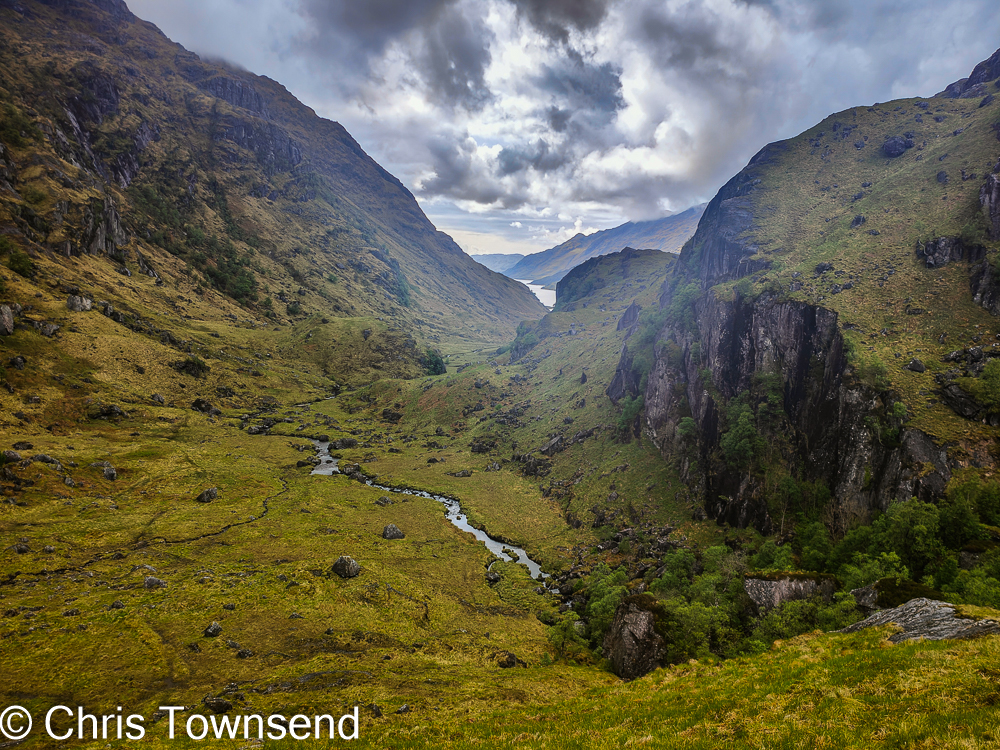
The view down to Loch Morar

Once through the chaos there was a wonderful view down Gleann an Obain Bhig to Loch Morar. As we descended this glen the rain and wind eased and we set up camp not far from the loch in the dry.

Second camp: the sun starts to appear

There was more rain overnight though and the next day came with low clouds, gusty winds, and showers. Not an ideal day for a steep climb to rocky summits but we decided to go anyway. The climb up onto the west ridge of Meall nan Each, which we had to cross to reach Carn Mor, was very steep, rising some 350 metres in less than a kilometre. The pathless terrain was very rough too, a mass of tussocks, bog, and rock. Hand and occasionally knees were used at times.

Tony on the ascent to Meall nan Each

By the time the angle eased the wind was stronger and the cloud was not far above. After crossing Meall nan Each we spent a while searching for a reasonably sheltered site, eventually finding one at the head of a shallow gully just below the ridge. There wasn’t really room for either of our shelters but we managed to squeeze them in with just enough room to lie down. I reckoned it was better doing this than camping on more spacious but much more exposed sites a little higher up.

Third camp: somewhere on Meall nan Each

The storm continued all night and into the next day. Heading for Carn Mor we were soon in the cloud and needed to keep a careful watch on our navigation as we threaded our way through the complex rocky and boggy terrain. The summit came and went in mist and rain – the views are probably excellent!

The storm starts to fade

The roughness lessens beyond the summit and the going and navigation were both easier. A flash of rainbow below us marked the fading of the rain and cloud too and soon after we reached the edge of the forest in Glen Dessary the sun was coming out. Finding dryish and flattish spots to camp wasn’t easy and we ended up out of sight of each other.

Fourth camp: Glen Dessary

The final day was just a stroll in the sunshine, mostly in the forest, back to our cars. Here Tony headed off on the long journey back south. I restocked my food supplies and swapped some items of gear then set off again, this time for a solo eight day walk. I’ll tell that story in my next post.

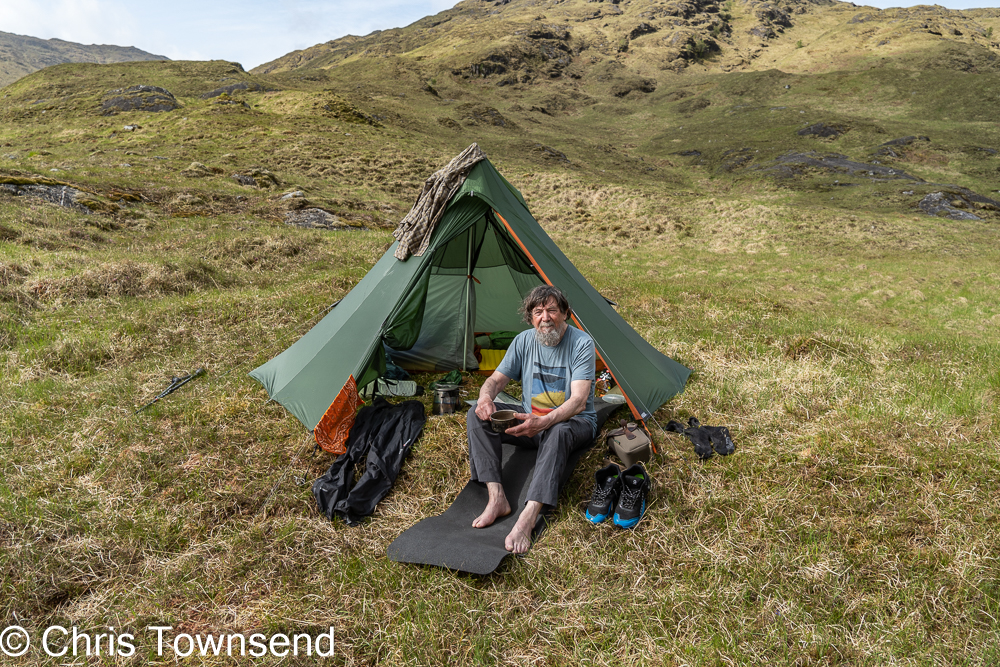
Enjoying the sun and airing damp gear at the Glen Dessary camp

Tony recorded a great deal of video during the walk, including a chat with me about the gear I was using for his
You Tube channel. That chat and four other videos are already online and Tony says there will be two more. Tony’s perspective on our trip is interesting!

Monday 15 May 2023

Photography Post: New camera, lens & accessories


New camera and lens

Since 2016 the Sony a6000 has been my main camera and it has been excellent. It’s been on every walk since I bought it and has taken many thousands of photos - 42,244 according to Lightroom and that of course doesn’t include deletions. However it is beginning to show its age and has developed a few quirks, most annoyingly it changes settings and opens menus at random. My half dozen batteries are fading too, only taking half the pictures they used to before needing recharging. They never lasted long anyway and on anything longer than a day walk I always carried four of them. Pondering this I decided I needed a new camera and new batteries. That was some time ago and the camera quirks have got more pronounced and the battery lives shorter. Rather than ponder I decided to actually do something and started looking for a replacement for the a6000.

Now since the a6000 was launched in 2014 there have been five successors in the a6xxx series, though none since 2019. Looking through the specs of these five cameras one stood out, the a6600. It is heavier than the a6000 – 503 grams rather than 344 grams but it has a much bigger battery meant to last over twice as long so I shouldn’t need to carry so many spares. The a6600 also has two other advantages – a flip-up mirror for selfies and vlogging (this might encourage me to do more videos!) and built-in stabilisation, useful for non-stabilised lenses. There are plenty of second-had ones available and I’ve bought one in excellent condition from MPB, a company I’ve used before for both buying and selling and who I’ve found reliable with great service.

Sony a6600 & Sony E 11mm lens

Along with the camera I bought, new but on sale, a Sony E 11mm F1.8 lens. This replaces the Samyang 12mm F2 lens I’ve had since 2015 which I’m selling. Now the Samyang is a good lens and I’ve taken some great night shots with it, which is the reason I bought it. However it’s a fully manual lens with no electronic connections to the camera. This means no autofocus, which the Sony 11mm has, though this isn’t a huge deal in an ultra-wide-angle lens, but also no record of settings. I’ve recently been using DxO Photolab 6 and DxO Deep Prime for processing raw files (more on this in future posts) and have found the results superb. Having lens information is crucial for this. DxO has a huge database of cameras and lens but this can’t cover non-electronic lenses like the Samyang that provide no information. The Sony 11mm is recognised by DxO.

The next two weeks I’ll be out camping in the hills with the Sony a6600 and the Sony 11mm lens. I’ll find out just how long the camera battery lasts and when I’m home just what results I can get from images taken with the 11mm lens in DxO software. I hope I’m not disappointed on either count!

Peak Designs

I’ve also been trying out some products from innovative camera accessories company Peak Design, namely the Capture Camera Clip, the Leash, and the Travel Tripod.

Capture Clip plate attached to camera base

The Capture Clip is a two-part device that lets you carry your camera securely on a rucksack strap or a belt and access it almost instantly. Now I’ve always carried my camera in a padded bag slung across my body which gives reasonably quick access whilst providing protection against rain or knocks. I really wasn’t sure how I would like having the camera hanging free.

Capture Clip in place

The Capture Clip consists of a plate that screws onto the base of the camera and a two-part Clip that fastens round the strap with two screws, total weight 84 grams. The plate slides into the clip and immediately locks into place. I tried it with my biggest and heaviest camera and lens combination – the Sony a6600 with Sony E 70-350mm lens – which weighs 1.2kg and it felt very secure on a walk over rough boggy ground where I was lurching around a great deal. It also felt comfortable and once I was used to finding and pressing the release button I could have the camera to my eye far faster than when removing it from a bag.I also tried it with the a6600 and lighter Sony E 18-135 lens (863 grams total) and this was also fine.

Sony a6600 & Sony E 18-135 lens attached to the Capture Clip

Of course the Capture Clip gives no protection against rain or knocks so I would still carry a waterproof camera bag for use in rain or when scrambling. How useful the Capture Clip will be for multi-day backpacking I’ll find out on my forthcoming trip.

Peak Designs Leash

On first attaching my camera to the Capture Clip I immediately discovered that the dangling camera strap was a nuisance. As I rarely actually use a camera strap I’ve always stuck with those that come with the camera. These however are hard to remove and hard to adjust. The one with the Sony a6600 does have quick release buckles so most of the strap can be easily removed but this still leaves fairly long pieces of webbing with chunky buckles hanging down in the way. To solve this I bought a Peak Design Leash. This is a brilliant strap. It attaches to the camera with tiny anchors that can be released very quickly and which are then barely noticeable, and it is very easy to adjust. I might finally start using a camera strap quite often.

Peak Designs Travel Tripod alongside the Sony a6600 with 70-350mm lens

Along with the Capture Clip Peak Design also loaned me an aluminium Travel Tripod. This is also brilliant, the best tripod I have ever used. But it’s also the heaviest at 1.56kg – there is a carbon-fibre version but that still weighs 1.29kg. The tripod I’ve used for many years, a now battered Velbon V-Pod weighs 281 grams. When I wrote about tripods for backpacking back in 2017 I gave one at 396 grams as the heaviest I’d consider as a replacement for the V-Pod.

Sony a6600 with 70-350mm lens on the Peak Design Travel Tripod

The Peak Design Travel Tripod is superbly designed. It’s very compact for the size, fast to set up, and easy to use. A camera fitted with the Capture Clip plate can be slid onto the ball head very quickly. I took the tripod on the same walk as the Capture Clip and set it up on a breezy summit. It easily supported my camera with 70-350 zoom lens – a combination that’s too heavy for the V-pod but then I’d never take that lens backpacking. If the weight doesn’t matter this is a brilliant tripod. I’d love Peak Design to make an ultralight version.

Just Mobile Shutter Grip 2

Using a smartphone for more serious photography and especially for videos over the last year I quickly came up against the limitations of trying to hold it securely and without my fingers getting in the image so I looked for a clamp with a shutter button to make this easy. The first one I bought was inexpensive and did make using the phone easier. It only had one position though. Then I discovered the Shutter Grip 2. This is another brilliant accessory. It not only provides a solid handle with a wireless shutter button but has a built-in selfie stick and a tripod thread. It can also be used as a phone stand. It weighs just 68 grams and is now something I wouldn’t be without. It really makes a huge difference to smartphone photography.I'll take some pictures of it in use on my next trip.